How to create a simple saved search in NetSuite

Introduction
NetSuite is a powerful tool for managing your business data, but sometimes digging through that data to find exactly what you need can feel overwhelming. That’s where saved searches come in. Saved searches are one of NetSuite's most useful features, giving you a way to pull specific data, analyse trends, and even automate reporting. If you're new to saved searches, don’t worry, this guide will walk you through the basics step by step.
What is a Saved Search?
Think of a saved search as a custom report. It allows you to filter, sort, and display information from your NetSuite account in a way that makes sense for your business needs. Once you create a saved search, you can save it and revisit it at any time. You can also schedule it to be emailed regularly to you or your team, making it a huge time saver.
For example, create saved searches to:
- See which invoices are overdue
- Provide a list of customers who bought a specific product in the past month
The flexibility saved searches offer is one of the reasons they’re so widely used in NetSuite.
Benefits of Saved Searches
Saved searches are more than just custom reporting tools, they’re essential for better decision-making. Here are some key benefits:
- Efficiency: You can pull up key data quickly without digging through dashboards or menus
- Automation: Schedule searches to run automatically and send updates to your inbox
- Customisation: Tailor the search criteria to your specific needs and add filters to drill down into important details
- Improved Insights: Get a clear view of trends, opportunities, and risks, helping you make smarter decisions
Now that you know what saved searches are, let's get started on creating one.
Step by step guide to creating a simple Saved Search
Here’s an easy example to help you create a saved search for overdue invoices. You can adapt these steps to fit pretty much any search you want to create.
Step 1: Go to Saved Searches
- Log in to your NetSuite account
- Navigate to the top menu and go to Reports > Saved Searches > New
- Select the type of record you want to base your search on. For overdue invoices, choose Transaction
Step 2: Define search criteria
- After selecting Transaction, you'll land on the "Search Criteria" tab
- Here, you can filter the data. Click Filters, then set the following:
- Type: Select "Invoice"
- Status: Select "Open"
- Due Date: Choose "on or before" and select the desired date (or use “today” to keep it dynamic)
- Add any other filters that make sense for your search, such as specific customers or payment terms
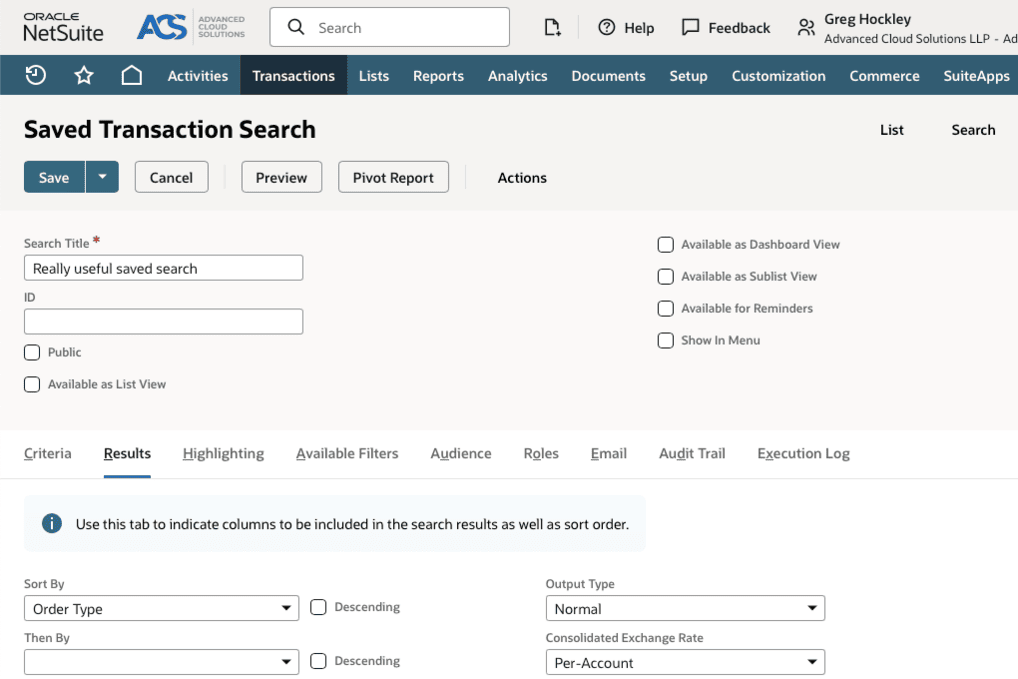
Step 3: Choose your results
- Switch to the "Results" tab. This is where you define the columns that will show up in your saved search
- Common fields to include for overdue invoices might be:
- Invoice Number
- Customer Name
- Amount Due
- Due Date
- You can drag and drop columns to adjust the order or grouping
Step 4: Test the search
- After setting your criteria and results, click Preview to see how your search looks
- Check the results and make adjustments if needed by going back to the "Criteria" or "Results" tabs
Step 5: Save the search
- Once you're happy with the results, click Save
- Give your search a clear name, like "Overdue Invoices"
- If you want, you can set it as a public search so others on your team can use it, or schedule emails to automatically send the results
And you're done! You’ve just created your first saved search.
Example: Customer purchase history
Need to see which customers purchased a specific product in the last quarter? Follow the same process:
- Choose the Transaction record type again
- Set Filters that include:
- Type: "Sales Order" or "Invoice"
- Item: Select the product
- Date: Set to "within last quarter"
- Under Results, include Customer Name, Item, Quantity, and Order Date
- Save and preview your search to refine it
Tips for customisation
- Use Formulas to Create Advanced Filters: You can use SQL-style formulas for more precise searches. For example, a formula to calculate overdue days can add an extra layer to your report
- Group Data for Better Organisation: Use the “Summary” option in the results tab to group data by items, customers, or other fields
- Don’t Forget Permissions: If your saved search contains sensitive information, limit its access to specific roles
Troubleshooting common problems
- Why Don’t My Results Look Right? Double-check your filters. A wrong filter can exclude data you need or include data you don’t want
- Why Can’t I See a Saved Search? It might be restricted based on role permissions. Check with an administrator
- Can’t Add a Field to Results? Some fields are related to specific record types and may not be available for certain searches. Try rethinking your criteria
Final thoughts
Saved searches in NetSuite may feel tricky at first, but with a bit of practice, they'll become a go-to tool for gaining insight into your business. Whether you’re managing overdue invoices, analysing customer orders, or tracking inventory trends, saved searches help you work smarter, not harder. Start simple, experiment with filters and results, and soon you'll be a pro at creating customised reports that keep you informed and in control.Now it’s your turn! What saved searches will you create first?
