How to create custom reports in NetSuite

Introduction
Effective decision making begins with good data. For businesses using NetSuite, custom reports are powerful tools that unlock deeper insights into operations, sales, financials, and more. Whether you're a manager looking to track KPIs or a finance professional analysing budgets, custom reports empower you to tailor data views to your exact needs. This guide will walk you through the steps to create custom reports in NetSuite and help you harness its reporting potential.
Why custom reports matter in NetSuite
Standard reports in NetSuite provide valuable insights, but they may not always capture the specific details relevant to your business's unique requirements. Custom reports enable you to modify fields, filters, and layouts, ensuring your data works for you. They streamline processes, save time in analysis, and help you maintain a competitive edge by focusing on what truly matters to your organisation.
If you're ready to optimise your reporting process and analyse data on your terms, follow the steps below.
Step by step guide to creating custom reports in NetSuite
Step 1: Access the reports menu
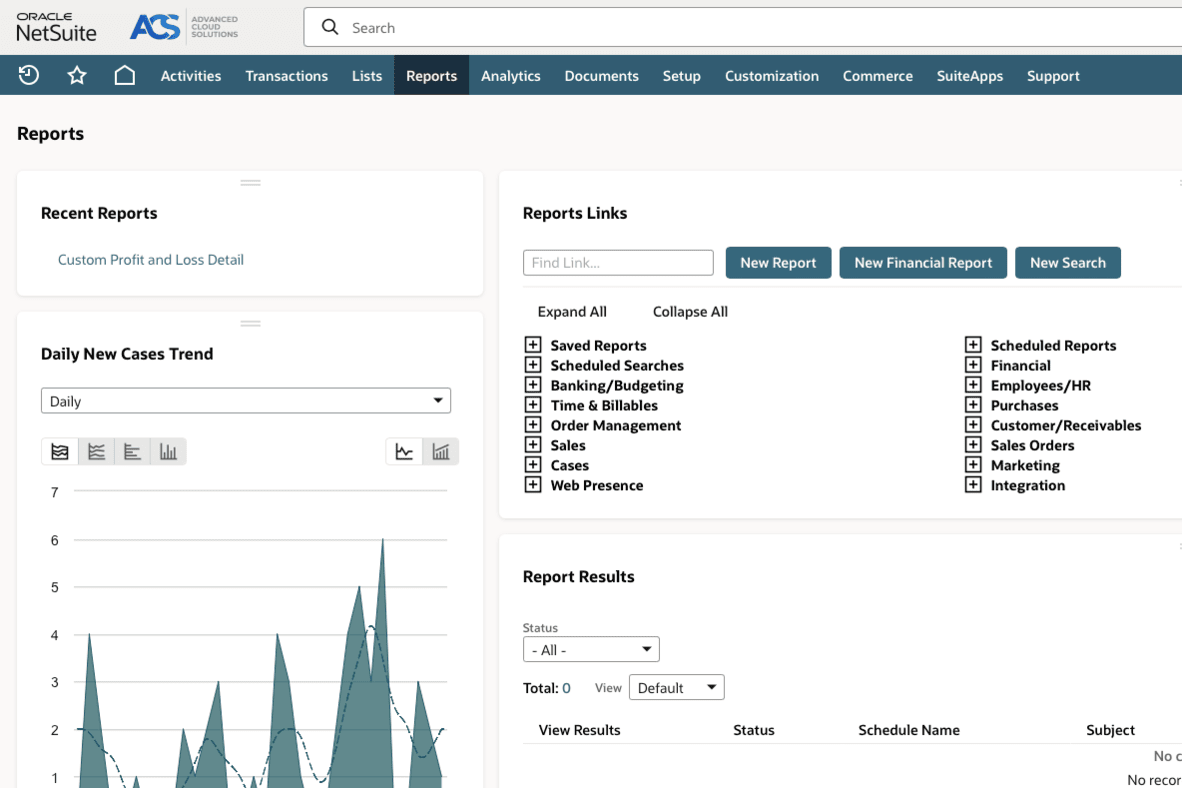
To begin, log into your NetSuite account. From the main dashboard, locate the Reports tab in the navigation menu. Click on it to take you to the Reports dashboard where you can explore the different report types available. Depending on your business needs, you can choose financial, transactional, or inventory reports as the foundation for customisation.
Tip: If you're uncertain which report suits your needs best, start with one of the standard reports provided by NetSuite. These serve as an excellent baseline to modify further.
Step 2: Open the report builder
Once you've selected the report you want to customise, click on the Customise button. This will open the NetSuite report builder.
Step 3: Add and customise fields
Fields are the data columns displayed in your report (e.g. customer name, transaction date, or total revenue). To customise them:
- Click on the Edit Columns sub-tab at the top of the report builder
- Use the field selector to add columns relevant to your report
- Rearrange columns by dragging and dropping them into your desired order, or by using the Move Left and Move Right buttons
You can also rename fields or create calculated fields for derived metrics like profit margin or year on year performance comparisons.
Step 4: Set filters for precision
Filters refine the scope of your report by narrowing down specific datasets. Use filters to focus on the data that matters most. For example:
- Add a date range filter to analyse data from a specific time period
- Use transaction type filters to view only Sales Orders or Invoices
- Apply department, location, or customer-based filters to customise the report for your audience
The more granular your filters, the more actionable your report becomes.
Step 5: Adjust the layout
Customising layouts enhances readability and ensures only useful information is presented. You can:
- Change grouping and subtotalling options for better data organisation
- Highlight or format key metrics for emphasis
- Add visual features like charts or graphs for a more dynamic view
Preview your report frequently to verify that the layout looks professional and helps convey insights clearly.
Step 6: Save and share your report
Once you're satisfied with your customisations, click Save to retain your changes. You can name the report, assign it to categories for easy navigation, and define user permissions to control who accesses it.To share your report with colleagues:
- Export it to formats like Excel, PDF, or CSV for offline sharing
- Schedule the report to be automatically sent via email at regular intervals
- Enable dashboard tiles for real-time access to essential data
Tips for optimising custom reports
To get the most out of NetSuite’s reporting tools, keep these tips in mind:
- Leverage saved searches: Before creating a report from scratch, consider if a saved search can meet your needs. These are particularly effective for real-time data queries
- Use role permissions wisely: Granting appropriate viewing permissions ensures sensitive data stays secure while collaboration thrives
- Avoid overloading reports: Focus on including only the fields and filters necessary for your analysis. Overly complicated reports can be harder to interpret
- Regularly update reports: Business priorities change. Regularly revisit and refine your custom reports to ensure they remain relevant
Common pitfalls to avoid
While creating custom reports can be straightforward, there are some traps to watch out for:
- Skipping data validation: Ensure the data you're reporting is accurate and complete before customising it. Errors in data entry can lead to incorrect insights
- Using too many filters: Too many restrictions can exclude critical data that might otherwise provide valuable insights
- Neglecting performance impacts: Overloading reports, especially with too many calculated fields, can slow system performance
By avoiding these pitfalls, you'll create reports that are both high-performing and highly reliable.
Final thoughts
Custom reports in NetSuite allow you to take control of your data. They empower business professionals to transform raw information into actionable insights, paving the way for smarter decisions. If you haven’t explored NetSuite’s reporting functionality to its full extent, now is the perfect time to start. With a little practice, you’ll master the art of creating tailored reports that cater to your specific business needs.Want to learn more? Log into NetSuite and start experimenting with the report builder today. The insights you're looking for could be just a few clicks away.
